Thursday, November 5, 2015

Carrying Tray

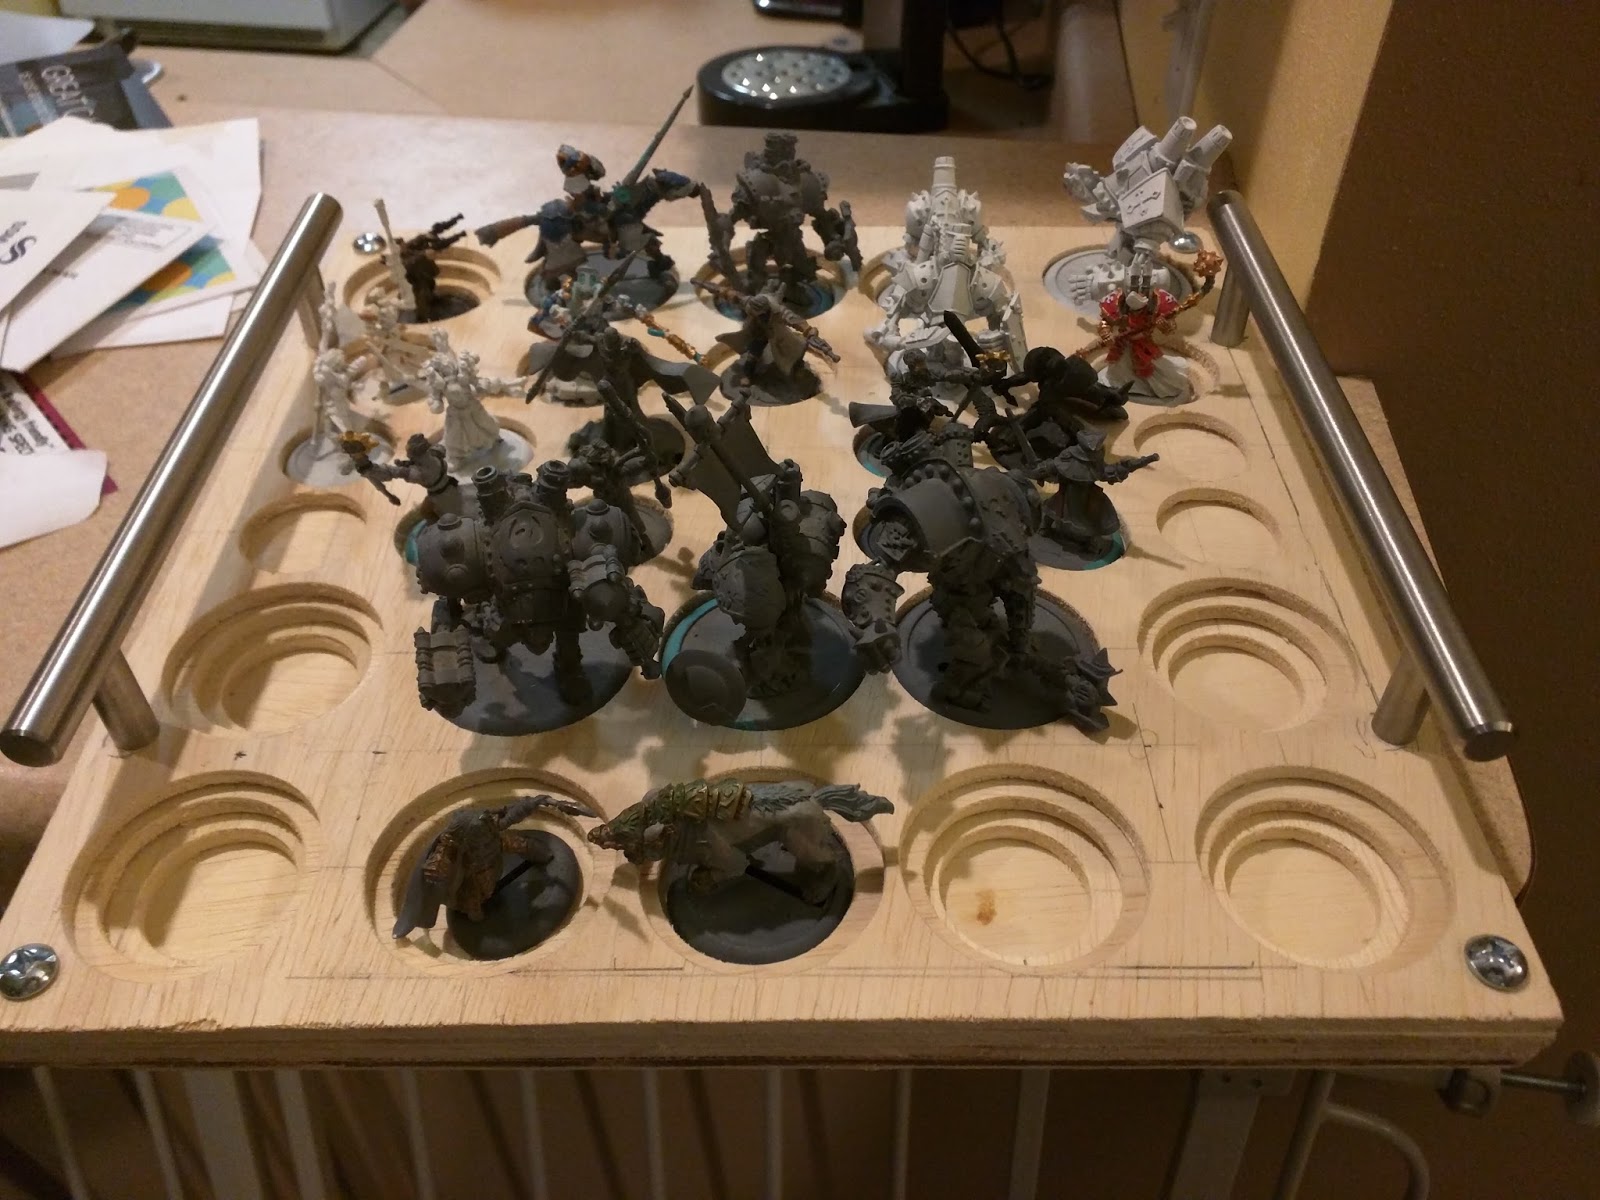
So I've seen a few people at the gaming store carrying around their army from table to table with a tray that has holes cut out in it for the various base sizes.  I decided that I could make such a project work and started in on one.

My first attempt was using MDF.  Not a bad choice but I always forget how much dust is created when you drill or saw it.  I also wasn't sure how close I could put the holes to each other.  So I measured a bit lean and ended up drilling out the pieces between holes.


So I went back to the drawing board.  Decided to use a bit tougher material and remeasure the holes to drill.  I went with 1/4" sanded pine, which came in 2'x4' sheets.  Since the holes for the bases I was going to be cutting were measured in Millimeters I decided to cut my board into 30mmx30mm boards, which gave me 8 total.  I split these into 2 piles of 4 boards.  My thinking was that if I made a large base hole in the top level, then a medium base in the next one down and a small base in the next one, I would have one more board for a base to cover all the bottom.

My next step was drilling the holes in the boards.  I had recently acquired a drill press, now I just needed some bits to drill the holes I needed.  I borrowed some wood hole drill bits from a friend and tried those.  The large and medium bits were alright at drilling, but the small bit would just heat up and burn the wood.  After some investigating I decided to get a set of Forstner bits.  I found one that had all three sizes I needed and proceeded to work.

After drilling through all the holes for the project I got really good at making them without ripping out the backside of the board.  Which I tended to do quite a bit of when I first started.

Once I had drilled out all of the holes it was time to line up all my boards and put in the bolts to hold everything together.  This along with the bolt holes for the handles finished up all the drilling I would need.

Now to finish any sanding it needs and to paint it up. Any color choices from the internet?

Wednesday, November 4, 2015

Tonights Accomplishments

So tonight between rounds of Fallout Shelter, I finally got back to painting. A coworker gave me some Star Wars figures that he wanted painted.

So I decided that I should dig in and start painting again.  In addition I pulled out some my Bones Kickstarter miniatures and started in on them as well.
So here we have the Shadow, a Pathfinder goblin, a Dwarf sword and board fighter and a rat swarm, in addition to the Rebel Trooper.

I also built something I should have a long time ago.
A block of wood with some poster tack on the end of it.  I've read about painters using them to hold miniatures while painting, but I never thought of myself as a serious enough painter to use one.  Well, wow, was I wrong.  This made it so much easier to look under an arm and paint without smudging or messing up the rest of the of figure. So yeah, I highly recommend making one of those to paint. 

Sunday, November 1, 2015

Long Time, No See

Ever since going back to school I've had to put a bunch of my projects and hobbies on a shelf.  Some of those literally. I've also picked up another hobby. I bought a tiny quad copter off of Amazon to learn to fly quads. So far I haven't hurt myself or anyone else. My copter of choice for this endeavor was the Hubsan X4 H107D. Mostly because it was on Amazon Prime and had a camera on it. I watched a few videos on Reddit about fpv video quads and wow are they pretty fun. So reading into the subject, the common wisdom is to buy a cheap little quad to learn how to fly and then move up and build a quad for whatever purpose you'd like. I believe I'll be building one for aerial photography eventually. This hobby brings in my electronics knowledge and training as well, which is a nice bonus. When I decide on a build I will document it for anyone to follow.

In other news I feel an itch to go back to painting. A friend at work asked me to paint up some of his Star Wars miniatures. I haven't painted anything futuristic in quite some time. I think it'll be a good change of pace, and it will be a chance to flex my painting muscles again.

Wednesday, May 27, 2015

Holy Cow, Two in a Row.

So I've added Circle Warlock Mohsar to the rotation. I've liked his model for a long time but never quite had an idea for what colors to go with on his cloak. I've seen some that went with the desert theme and done the tans and browns and some kept with the rest if the Circle theme and used the greens. I avoided making a decision on this by working on his scythe and inner tabard.  I also did some work on my Circle Warpwolf Stalker.  I really like how the bronze armor has green seeped into it.  I'm still working on making the green pop a little more.  I am learning as I paint more armor for Circle.  I did do some more work on Captain Kraye.  I keep getting to the point when I paint of not wanting to pull the trigger on doing a lot of the metal work.  I need to line up a bunch of models that need metal work and hit them all at the same time.  Yeah, that will be the fix for it.

Tuesday, May 26, 2015

Painting Update

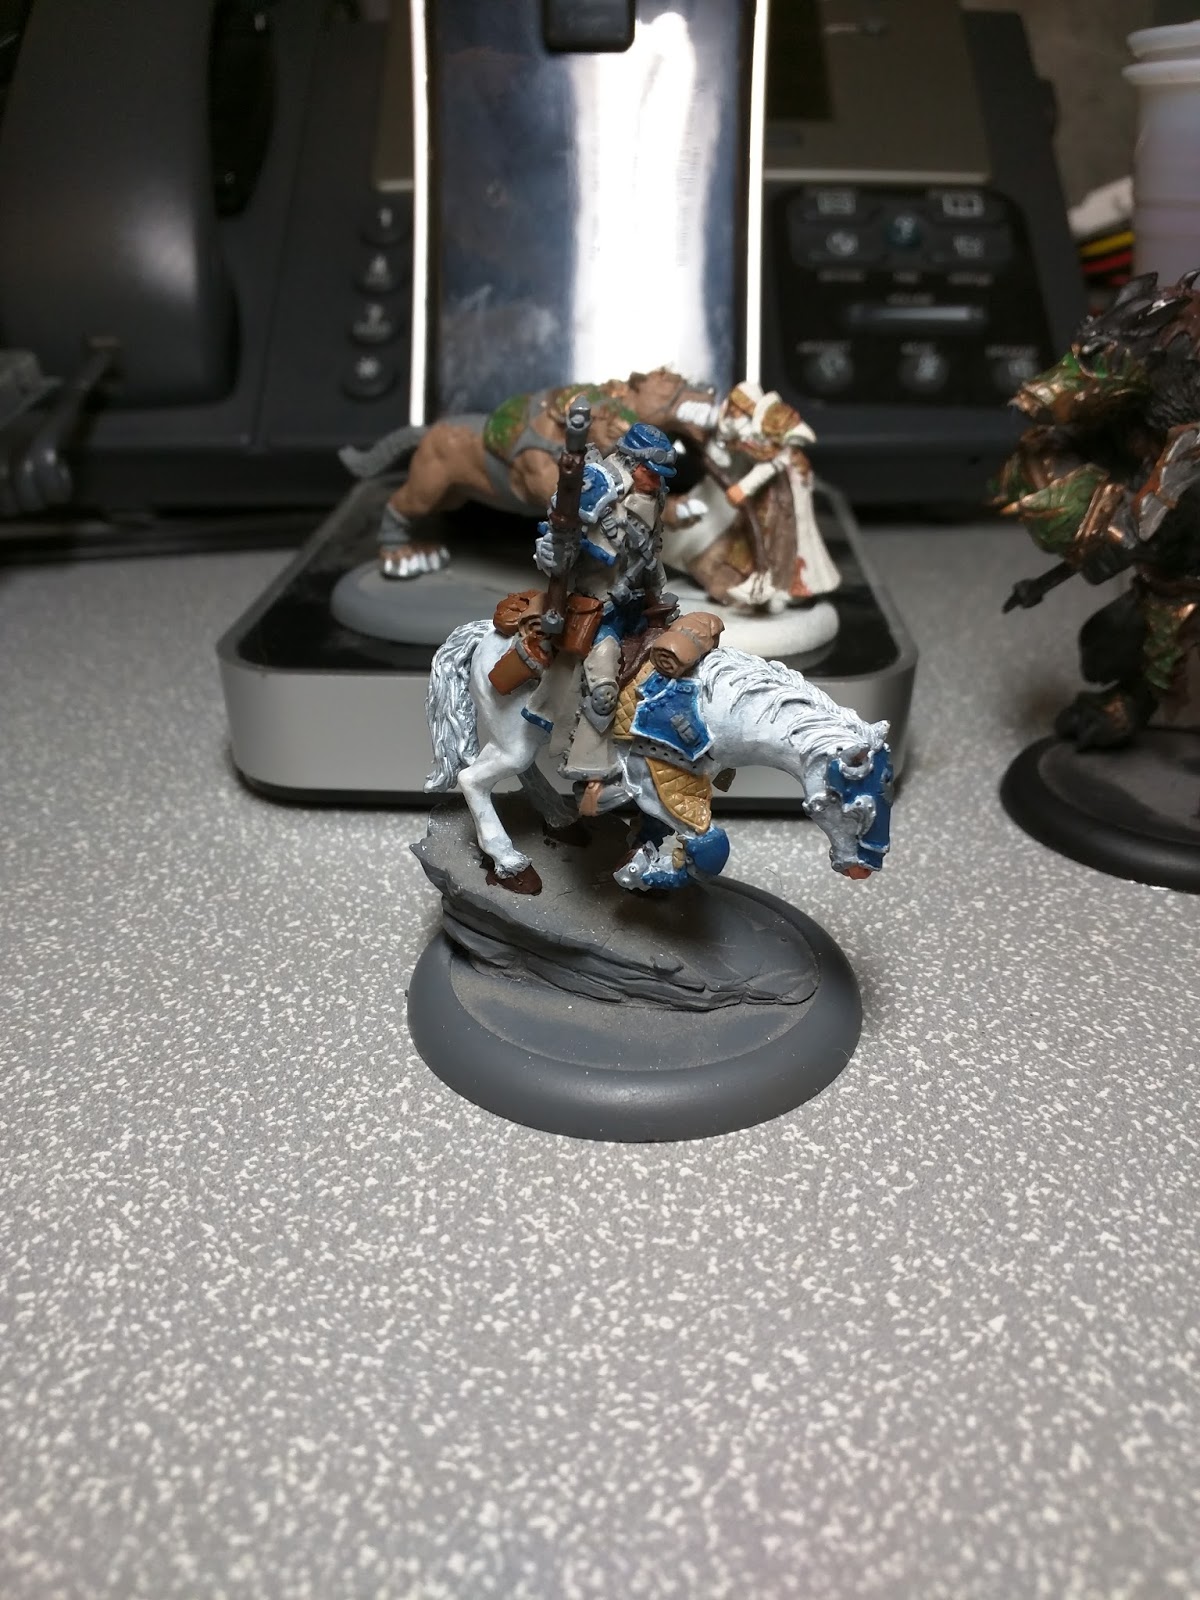
Finally getting back to painting after quite a bit of time away.  I started on my second Circle Argus and Cygnar's Captain Jeremiah Kraye. Im slowly remembering how to paint again.  At least all my paints I've opened up so far are still paint and not sludge.


Thursday, December 5, 2013

Updates with Painting

So I've been lazy lately.  You can say it was the holidays and lots of other things popped up that kept me from painting and doing lots of other hobby related things, but the truth of the matter is that I just couldn't be bothered to get the paints out and start in on some miniatures.  So thankfully last night was another gaming night and I just happened to bring my carrying case along with me. It felt strange but comfortable to get the paints out and start applying brush to model.

So mostly this is going to just be an update on which models I've been concentrating on and how far along they are, so here's models...

First up is Krueger the Stormlord.  I had him mostly done for a bit of time now, but I wanted to do the same highlighting I did to Morvahnnas cloak to his.  So it came out really watery across his back which I really liked.

Next up are some more Circle minis. My first crack at the Tharn Bloodweavers.  I was originally going to go with a more brown color scheme like I did with the Bloodtrackers, but I had the green on my palette already from working on Kruegers cloak so I went with it.  So far I'm liking how its looking.  Im going to have to go back over the skin with some of the new flesh paints I picked up. I think a pale skin with the green highlighted on the skirt and top will look cool. Especially with dark brown hair and mask.  Then there is my Woldwatcher.  I really like this model and I should probably pick up another one.  I followed one of the tutorials for making the green runes glow from all over his body.  Now I just need to go back over and clean up some of my work and he should be ready to go.  I realized how bad that mold line was after I started painting him and now I'm going to leave it.  I was debating trying to find a way to make it look like two pieces of stone that got smashed together but that might be a project down the road a few decades.


Then we have Morghul, Kreoss and Ryan.  I think I used a bit too dark a red on Morghul so far. I might go back over him and make it highlight up a bit more.  Kreoss has the opposite effect. Since he was primed white the red is coming out almost pink on parts of him.  So I might have to wash this a few times to get the red to darken to a more magenta.  Ryan is going to take some figuring out.  Im not sure if I want to do like their pictures and paint every buckle on their outfit, but I keep really like their artwork so it might end up happening that way. I just want to finish one of the Black 13th so I'll have something to go on for the other two.


 Finally we have Katherine Laddermore.  I've always liked this model and I wish I used her more when I actually got to play.  Maybe I will now when she is painted.  I'm a huge fan of the Cygnar blue color.  This will be my first time using the highlight color for blue.  After my experiments with the green on my Circle figures I think I'm finally comfortable enough to do it on the blues.


So that's what I worked on last night.  Hopefully I'll be able to do more weekly and post them.  Maybe even finish another battle box and talk my gaming group into Wargame Wednesdays.

Wednesday, November 6, 2013

Painting On The Go

Lately I've been painting mostly at my two gaming nights.  I carry my Army Transport about half full of trays of various miniatures I want to paint. I have the foam tray for paint pots they made which is full of my P3 paints. I also carry my water cup and the folded paper towels I use as well as my makeshift wet palette as a to-go painting surface. My brushes take the brunt of carrying everything this way as they are just laid down between the rows of paint pots.  I've looked at various ways to carry my brushes in hopes of not damaging them as much as just laying them on the foam is doing. I've seen a couple of paint brush boxes with foam to hold your brushes up and away from each other. I may go with a homemade variant of that solution. Then I could modify it to carry other tools along with the paint brushes;glue, files and my pin vise. That way its not just a paint on the go box but a modeling on the go box. What does everyone else use? Do you model or paint on the go or only do either at your home station?